


scarface
-
Posts
610 -
Joined
-
Last visited
Content Type
Profiles
Forums
Calendar
Posts posted by scarface
-
-
sanırım bu can sıkıntısı azcık AŞK sıkıntısı kokuyor

-
doğrusunu istersen indirmedim, işime yarama olasılığı yok gibi birşey bu nedenle indirmeyide düşünmüyorum...
-
Autodata v6.2.0.0 2006 multilanguage - iSO ~ Fix most Cars
All cars from about 1960 to 2006
Technical Data for petrol and diesel engined vehicles
Programming procedures for ignition keys central locking, immobilisers and alarm systems
Service Schedules, intervals and times
Service illustrations
Timing belts, chains and gears
Repair times estimator
Wheel alignment specifications and tyre pressures
Accessing Trouble Codes, symptons and causes
Engine Management - component testing, pin data and trouble shooting charts
Airbags and seat belt pre-tensioners
Air Conditioning
Anti-lock brake systems
Component Locations for engine management, air airconditioning, anti-lock braking systems and airbags
Fuse box and relay plates - layouts and values
Circuit diagrams for engine management, air conditioning and anti-lock braking systems
Code:
More info http://www.autodata.ltd.uk/
Download ;
http://rapidshare.com/files/13919975/Adata_v6_by__ewares.org_.part01.rar
http://rapidshare.com/files/13922359/Adata_v6_by__ewares.org_.part02.rar
http://rapidshare.com/files/13924735/Adata_v6_by__ewares.org_.part03.rar
http://rapidshare.com/files/13927652/Adata_v6_by__ewares.org_.part04.rar
http://rapidshare.com/files/13932018/Adata_v6_by__ewares.org_.part05.rar
http://rapidshare.com/files/13971622/Adata_v6_by__ewares.org_.part06.rar
http://rapidshare.com/files/13917630/Adata_v6_by__ewares.org_.part07.rar
http://rapidshare.com/files/13937419/Adata_v6_by__ewares.org_.part08.rar
http://rapidshare.com/files/13946312/Adata_v6_by__ewares.org_.part09.rar
http://rapidshare.com/files/13951976/Adata_v6_by__ewares.org_.part10.rar
PASS:ewares.org
-
arkadaşlar deneyen oldumu ve oldu ise sonuç nasıl yazarmı acaba?
-
Herhangi bir marka ''kulaklığınızı'' mikrofon girişine takın; kulaklığınızın sol tarafı mikrofon işlevini yerine getirecektir.
Not : Bazı markalarda Sağ tarafı kullanmanız gerekebilir.
tabi bazılarındada işe yaramayabiliyor..
-
Tanıtım:
Ulead PhotoImpact'ın en son sürümü. Özellikle dijital kamera kullanan ve çektikleri resimler üzerinde düzenlemeler yapmak isteyen kullanıcılar göz önüne alınarak hazırlanmış. Ayrıca yazılımın ana resim düzenleyicisi Photo Explorer, Gif Animator ve PhotoImpact Album olmak üzere 3 yardımcı uygulama ile de desteklenmiş. Photo Explorer, resimleri organize etmek için kullanılacak bağımsız bir yazılımken, Gif Animator de web için etkileyici GIF animasyonları üretmek için hazırlanmış. PhotoImpact Album’ü ise fotoğraf veri tabanları hazırlamak için kullanabilirsiniz.
Yazılımda Bulunan Diğer Özellikler
Fotoğraflarınızdan isterseniz belli objeleri çıkartabilirsiniz ve bunu programın sihirbazları ile hiç zorlanmadan başarabilirsiniz.
Fotoğraflarınızdaki gölgelenmeleri yok edebilirsiniz.
Filtreleme efektleri ile fotoğraflarınızın görüntülerini iyileştirebilirsiniz.
Web sayfalarınız için Java efektleri oluşturabilirsiniz.
Fotoğraflarınızdaki kırmızı göz sorununu birkaç adımda kolaylıkla çözebilirsiniz.
Download :
http://rapidshare.com/files/24342380/photoimpact.part1.rar
http://rapidshare.com/files/24342302/photoimpact.part2.rar
http://rapidshare.com/files/24342095/photoimpact.part3.rar
-
Masaüstünü bir akvaryuma dönüştürün... Ve Çeşit çeşit balık besleyin...
Download :
http://depositfiles.com/files/746250
Alternatif :
http://rapidshare.com/files/24201339/SADesktop.2006.Pack.rar
-
-
sayfayı açınca (Download for free with FileFactory Basic) yazan yere gel ve tıkla, açılan pencereden devam edersin.
-
Download :
01. http://www.filefactory.com/file/07af15
02. http://www.filefactory.com/file/4ee0b1
03. http://www.filefactory.com/file/fa1c8c
04. http://www.filefactory.com/file/0b2649
05. http://www.filefactory.com/file/330022
06. http://www.filefactory.com/file/a67588
07. http://www.filefactory.com/file/eb4195
08. http://www.filefactory.com/file/9e99ad
09. http://www.filefactory.com/file/6aa017
10. http://www.filefactory.com/file/95cbf2
11. http://www.filefactory.com/file/c79001
12. http://www.filefactory.com/file/279e26
13. http://www.filefactory.com/file/75c619
14. http://www.filefactory.com/file/dd3a44
15. http://www.filefactory.com/file/82a5ce
16. http://www.filefactory.com/file/c6c53f
17. http://www.filefactory.com/file/a0e5a9
18. http://www.filefactory.com/file/503e1b
19. http://www.filefactory.com/file/61609d
20. http://www.filefactory.com/file/6a58de
21. http://www.filefactory.com/file/f04621
22. http://www.filefactory.com/file/dc5c43
23. http://www.filefactory.com/file/e6a5bd
-
Vistata teması daha fazla söze gerek yok.
-
If you have ever photographed a high contrast scene, you know that selecting the correct exposure will not avoid blown out highlights and flat shadows.
Main addition to v2.2
Generation of HDR images from differently exposed RAWs of most digital cameras (in batch mode). White Balance and output color space settings can be adjusted.
Ability to save the settings used for Tone Mapping in XMP files. Settings can then be loaded for tone mapping, both from the interface and in batch mode.
Option of a a bigger preview for the Tone Mapping.
Ability to drag-and-drop image files from Windows Explorer.
Reduced memory needs for Tone Mapping (40100 less memory necessary in batch mode and 20100 from the interface).
Örnek Fotolarda görüldüğü üzre, resimlerinizde ışığın patlamasıyla karanlık kalmış bölümleri onaran bir program...
Download :
http://rapidshare.de/files/13097246/Photomatix.Pro.v2.2.1.WinALL.Incl.Keygen-ARN.rar
-
-
-
ClamWin - Açık Kayna (opensource)
ClamWin kolay bir kurulum imkanı ve açık kaynak kodu ile gelen bir antivirüs aracıdır.
Özellikleri: Tarama Randevulama, Otomatik virüs veristabanı güncelleme. ClamAV takımı virüs tabanını hemen hemen yeni bir virüs veya varyantı çıktığında tam uygun bir temel üzerinde günceller; İçeriği; Standalone Virus Scanner; Windows Explorer’a Menu Entegrasyonu; Microsoft Outlook eklentisi.
Lütfen ClamWin Free Antivirus programının gerçek zamanlı bir tarayıcı olmadığını hatırlatayım, virüs tespit etmek için kendinizin dosya taraması gerekmektedir.
Download :
-
Patriots : a Nation under Fire
Terrorists have just invaded US soil in an attempt to overthrow the superpower and achieve global supremacy. 50 major cities have already been devastated by nuclear attacks while others are left in total chaos. Join the Resistance as you grab your weapon and take to the streets to fend off the powerful surprise attack. From urban downtown city streets to rural residential parks, you'll engage in countless battles as you help fight for America's freedom.
Fight hordes of terrorists with advanced military weapons and tactics
A powerful 3D engine that allows for enormous explosions and impressive environmental visual effects
Location-specific damage that allows for massive, brutal destruction
Fight with numerous realistic and varied weapons in familiar US locations
Experience advanced enemy AI as terrorists attempt to snipe, flank, and even suicide bomb you
Use your squad of National Guard recruits to your advantage as you engage in intense combat
System Requirements
Operating System: Windows® 98/ME/2000/XP
Processor: 850 MHz Pentium® 3 or Equivalent
Memory: 256 MB RAM
Hard Disk Space: 1 GB
CD/DVD-ROM: 8x or Higher
Video: GeForce® 3/ATI® 8500 Video Card with 64 MB Video Memory
Sound: DirectX® 8.1b or Better Compatible Sound Card
Input: Keyboard and Mouse [/b]
http://rapidshare.com/files/3148311/tecpanuf.part1.rar.html
http://rapidshare.com/files/3148896/tecpanuf.part2.rar.html
http://rapidshare.com/files/3149403/tecpanuf.part3.rar.html
Download all parts and un-rar with password bennymac.Total file size is 272MB and you need to follow the instructions in the nfo file to install
-
Cabela's Big Game Hunter 2006 continues Cabela's outdoor sports series that lets you hunt a variety of big game animals.
By: Activision Value, Activision
Genre: Hunting
Download :
http://rapidshare.com/files/4395387/CBGHk6S.part01.rar
http://rapidshare.com/files/4395163/CBGHk6S.part02.rar
http://rapidshare.com/files/4395138/CBGHk6S.part03.rar
http://rapidshare.com/files/4395352/CBGHk6S.part04.rar
http://rapidshare.com/files/4395209/CBGHk6S.part05.rar
http://rapidshare.com/files/4395210/CBGHk6S.part06.rar
http://rapidshare.com/files/4395035/CBGHk6S.part07.rar
http://rapidshare.com/files/4395156/CBGHk6S.part08.rar
http://rapidshare.com/files/4394680/CBGHk6S.part09.rar
NO-CD CRACK
http://rapidshare.com/files/4394076/CBGHk6Sv1.0NoCDFixedDllEng.zip]
-
Combined Community Codec Pack ( CCCP ) includes :
- FFDShow 2007-02-14 CCCP
- Haali Media Splitter 2007-02-15
- MPV (Mpeg2) Decoder 1.0.0.3
- VSFilter 2007.01.09
- CoreWavPack 1.0.3
- Gabest's RealMedia Splitter 1.0.1.1
- Windows Media 9 VCM
- Media Player Classic 6.4.9.0
- ZoomPlayer 5.00 Standard
Supported media formats :
* Container formats: AVI, OGM, MKV, MP4, FLV and TS
* Video codecs: MPEG-2, DivX, XviD, H.264/MPEG-4 AVC, WMV9, FLV1, Theora, and Generic MPEG-4 ASP (3ivx, lavc, etc.)
* Audio codecs: MP1, MP2, MP3, AC3, DTS, AAC, Vorbis, LPCM, FLAC, TTA and WavPack
Changes in Combined Community Codec Pack ( CCCP ) 2007.02.22 :
- Haali splitter shell extension can now easily be enabled when installing
- Switched to inno setup for the installer
- Haali splitter now takes precedence over nero ogg/ogm filters when enabled
- Possible (but not recommended) to avoid rebooting when upgrading and there are files remaining
- Moved filters to separate dirs
- Updated haali splitter
- Updated ffdshow, no multithreading since it isn't currently stable enough
Download : http://rapidshare.com/files/18693145/Combined-Community-Codec-Pack.rar
Alternatif : http://depositfiles.com/en/files/657695
-
bıraktığın emanete hak etiği saygıyı gösteremeyen bir toplumun aciz bir ferdi olaak bundan utanç duyuyorum,siz sizin silah arkadaşlarınızın kanları ve canları pahasına savunduğu topprakları peşkeş çeken ve o kanların dküldüğü toprakların üzerinde gezmesi bir yana hayalinde bile görmemesi gereken kişilerin başı dimdik bir şekilde o toprakları çiğnemesine seyirci kalan bir toplumda yaşamaktan utanç duyuyorum, aslında utaç duyduğum o kadar çok şey varki, ama beni en çok utandıran bunları bildiğim halde elimden hiç birşey gelmemesi, ama sana söz veriyorum, çocuklarım bu utancı yaşamasın diye elimden geleni yapacağım, ve yapacak binlerce insan olduğuna eminim...
-
 1
1
-
-
-
Google's release of the newly improved and already insanely popular (and populous) Google Earth 4 boasts new capabilities for improved 3D images alongside more faithful renderings of terrain. 3D modelers are particularly enjoying themselves, thanks to the new "Photo Match" feature in Google SketchUp 6 that makes building 3D models and matching them to the terrain a significantly easier task.
Photo Match lets you build 3D designs from imported two-dimensional photos. Using the photo as a template, modelers get a leg up on scale and architectural structure, which fast-forwards the creation process. The models can then be integrated into GoogleEarth 4 for personal use--to visualize your remodeled abode planted on your block--or for permanent inclusion in the public landscape.
Though Photo Match makes the process of creating 3D models slightly simpler, there are still rules and concepts to keep in mind, especially if you're learning how to use Google SketchUp.
Step 1: Import the right image the right way
Photo Match only works as well as your understanding of spatial perspective. SketchUp helps you build a 3D object from a flat photo, but it's important that the photo you start with suggests its deeper dimensions. A flat photo taken facing square on won't offer enough visual clues to create a compelling 3D model, so choose a snapshot with angles, and avoid using cropped images.
Once you have your photo, choose "Import" from Google SketchUp's File menu, and open your image from the dialog box. It's important to select "Use for Photo Match" from the options on the right-side bar, and Google notes you should select "All image files" to make sure your image appears in the dialog.
Step 2: Mind your axes
Importing your photo into Google SketchUp results in a messy, yet colorful, axis-line interface.
Once your image appears in SketchUp, you'll notice a yellow horizon line and red, blue, and green axis lines that will help plot your photo's orientation. It's your job to match the axis lines to the parallels in your photo, since the program will only fill in geometry plotted along the axes.
Start by dragging the red and green axis segments over the most important parallels in your photo--the ones you'll be replicating with drawing tools. Click the tabs on either end of a segment to adjust its angle and length. Zoom in and out with your mouse scroll wheel to place segments accurately.
When you're finished with the major parallel lines, click and drag the yellow box to a "meaningful" place on your photo's geometry. With a photo of a building, this likely will be the bottom left corner of the foreground. This yellow box serves as your origin point, where all axes meet, and where you'll start building your model.
See how the corner you choose also moves the blue (vertical) axis line. Since this line affects the angle of all other vertical lines, you'll want to choose your origin point based on how closely the blue axis matches the slope of other vertical lines in your photo.
To start drawing, select "Done" from the Photo Match window. You can edit the axes at any point by right-clicking the mouse button and choosing "Edit Photo Match" or clicking the gear icon in the Photo Match window.
Step 3: Build your model (and heed these tips!)
Begin drawing (tracing) your first face at the point of origin, which is represented by a yellow dot. Once that first face is drawn, you'll be able to connect the geometry of adjacent portions of your structure.
It's important to pay attention to the dotted inference lines. They will appear colored if you're on an axis, or black if you're not. As always, you'll need to trust SketchUp's math over your eye; it's all too easy to create a structure that looks fine from one angle but is horribly out of whack when you rotate it. Holding down the Shift key while you draw keeps you locked onto an inference line.
Step 4: Visualize your model
Google SketchUp'sXray tool lets you view your original image.
While you can always use the paint tool to add color and texture, it will also write over your original image. There are two methods of adding details without obscuring the original lines. First, the X-ray feature will make your model transparent and allow you to see the outline and color of the photo beneath it. To turn it on, select "View," then "Face Style," and choose "X-ray."
Later in the modeling process, you can replace the model's appearance with the colors and textures from the photo underneath. When that option is ready, a "Project textures from photo" button will appear in the Photo Match window.
Step 5: Prepare to export
It's easy to add components, such as this desk lamp, from the 3D Warehouse.
Your model looks good--you've got colors, textures, spatial accuracy, and maybe an extra component you've downloaded from the 3D Warehouse to give it personality. There's still one thing you need to do before you begin the process to export your model to Google Earth: group its components.
With the arrow tool selected, click and drag your cursor from one corner of your model to the opposite, diagonal corner, which will select all components. Then simply right-click and select "Make Group." To disaggregate the components, right click again and select "Explode."
Download :
-
bilmiyorum belki yoktur piyasada ama vista nın türkçesi desek teşekkürlerr
vistanın türkçe yaması yok ama yakında tnctrvistayı download etmeye başlarız gibime geliyor
-
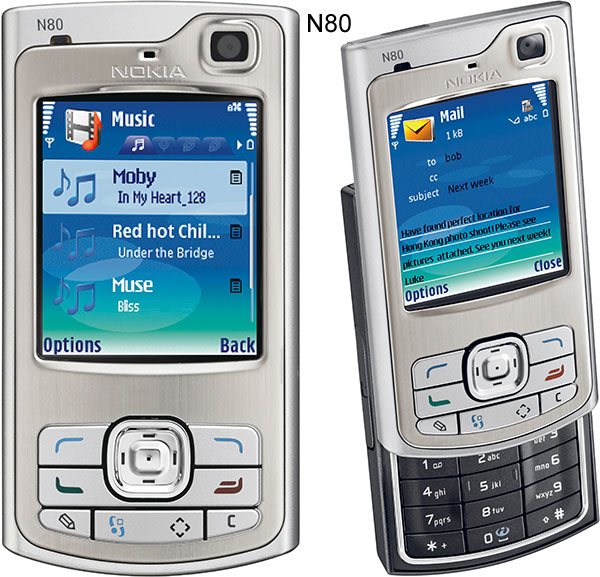
siemens sx1 ve nokia n80 ama aklım nokia n95 te
-
INFO :
Birden çok kullanıcı ile aynı anda Chat yapılabilmesi ( Multiuser Chat ) ve istenirse Ses İletişimi Sağlanabilmesi (Voice Chat) yeni uyarlamanın özellikle Yardım Masaları (Help Desk) düşünülerek eklenmiş yeni özellikleri arasında yer alıyor.
Bu özelliklerin Şirket İçi İletişim' de, sistem yöneticilerine çok faydalı olacağını umuyoruz.
Radmin 3.0' ' da güvenlik standarlarının yükseltilmesi özellikle ön plana alınarak daha da güçlendirilmiştir.
Tüm bu eklentilere karşın Radmin 3.0 hala aynı dosya boyutunu korumakta ve diskinizde çok az bir yer işgal etmekte.
Radmin 3.0 iki ana parçadan oluşur. Viever ve Server.
Yeni Radmin 3.0 Viever Radmin Server 2.x ile uyumludur. Ancak bazı özellikler ( örneğin chat ve voice chat) Radmin Server 2.X bu özellikleri desteklemediği için kullanılamaz.
Yeni Radmin Server, windows çekirdek yazılımı ile daha fazla entegre hale getirildi. Yeni Server Modülünün bazı özellikleri aşağıdadır.
Uzak uç bilgisayarının ekranın siyaha çevirir.
Mause ve Keybord tamamen kilitlenebilir.
Tam ekran text modunu destekler
windows 2000 ve Windows Xp video driverlarını tam olarak kontrol eder. Bu nedenle daha hızlı.
Uzak uç üzerindeki yazıcı kullanılabilir
Radmin 3.0 Server üzerinde şirket içi (in-house) testler devam etmektedir. Bu nedenle sunucu kısmı henüz Beta testine sunulmadı. Sunucu üzerinde Yeni bir güvenlik protokolü' nün geliştirilmesine devam ediliyor.
Download :
http://depositfiles.com/files/568723
or
http://rapidshare.com/files/13905642/Rem.Adm.3_soft-commander.net.rar
password:
www.soft-commander.net


Serials 2k v.8.2
in Program-Appz
Posted
Serials 2k v.8.2 ile internete bağlı olmadan 86.000 serial'e ulaşabilirsiniz.Birçok oyun ve programın seriali mevcuttur..
Download :
http://depositfiles.com/en/files/774575
Alternatif :
http://depositfiles.com/files/775026
Alternatif .
http://rapidshare.com/files/26364535/Serials_2k_v.8.2.rar